
Even the thought of seeing our beloved dog unresponsive and in a helpless condition is so frightening... Unfortunately, we can never be sure what situation we or our paw friend will get into. It is normal to panic and not know what actions to take. However, if we want to be prepared for this type of situation and know what steps we need to take, we have to educate ourselves.
Cardiopulmonary resuscitation (CPR) is a first-aid procedure. Doing (CPR) on your paw friend may seem scary, but knowing the steps on how to conduct it, can save your paw friend’s life.
It is not recommended that you do CPR on a healthy dog, as this can lead to physical injuries. Also, your dog is not likely to tolerate or feel comfortable with you trying to perform CPR on him/her. If he/she is resistant, you should stop.
What is Your Dog’s Condition?
It is of utmost importance to evaluate your canine’s condition prior to taking any steps further. Also, you should do it very quickly, as time is an essential factor in emergency situations. There are several things included in the process of “evaluating” your dog’s condition.
Is Your Dog Still Breathing?
The first thing is to determine whether he/she is breathing or not. In order to do that, you need to move your cheek or your hand (the back of your hand) close to your paw friend’s nose and try to determine if there is air going out. Another thing to pay attention to is your dog’s chest and whether it rises and falls or not. If he/she is breathing, you should immediately bring him/her to a veterinarian clinic.
If your paw friend is not breathing, you should gently open his/her mouth, very carefully pull the tongue forward and look for any objects that may block the airway. The second scenario requires quick action, and for you to be very cautious. Keep in mind that your dog, can accidentally bite you, so you should protect your fingers. In case there is no following reaction, you should do CPR.
Does Your Canine Have a Pulse?
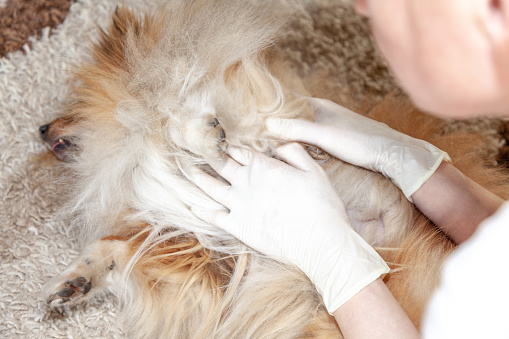
A dog’s pulse can be located on the femoral artery, which is on the inner thigh. You need to check one of the hind limbs and move to the point where it becomes a part of the body. There is an area where the artery is at its closest point to the skin and a kind of slope can be felt. It is recommended that you slightly press down to locate the pulse and use your fingers and not your thumb.
If you can not locate any pulse, there are two more options that can help you:
You can try to find a pulse on a metacarpal pad or directly on the dog’s heart.
The metacarpal pad is the heart-shaped pad in the center of the foot. It is larger than the other pads, so you will be able to recognize it.
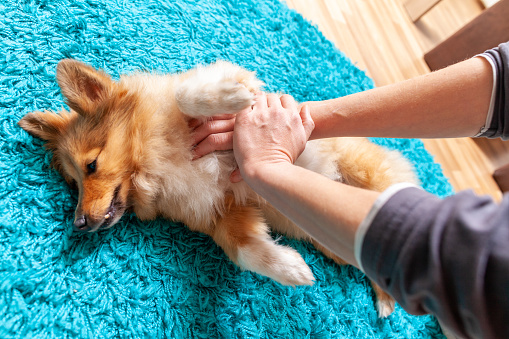
In order to locate your paw friend’s heart, you need to put him/her on his/her right side, and gently push the front left leg towards the chest, so that the elbow touches it. The heart is where the elbow and the chest touch.
There are two scenarios at that point:
-Your dog is not breathing, but has a pulse;
-Your dog does not have a pulse.
In the first case, the so-called Artificial Respiration will need to be done (we will talk about it a bit later in the article).
In the second case, you should do CPR, which includes both artificial respiration and chest compressions.
Steps on How to Do CPR
Step 1- The Right Position
Your dog should be placed on a flat and secure surface on his/her left or right side. Gently put his/her head and neck straight, so there is a direct way to the lungs and then check the tongue. Pull it forward, so it does not obstruct the path to the lungs. It should be against the back of the teeth, and the mouth should be closed. Barrel-chested dogs may be put on their back. Once you put your dog in the right position, you should find the right position for yourself-both a standing and a kneeling position behind your dog’s back works.
Step 2- Locate the Heart and Prepare for Making Compressions
If your dog is of a small breed or deep-chested, you should put the heel of one hand over his/her heart directly and then put the other hand over the first one. This approach is valid for cats as well.
If your dog is deep-chested, put the heel of one hand over the widest area of the chest and then put the other hand over the first one.
As we mentioned above, barrel-chested dogs can be placed on their back. Put one hand over the widest area of the sternum (sternum, also known as a breastbone, is a long flat bone in the central part of the chest), and then place the other hand over the first one.
Your palms should be one over the other and your fingers should be intertwined. If your dog is of a smaller breed, you can put your hand around his/her chest and put the thumb on one side and the fingers on the other.
Step 3-Start Making Compressions
You should start making compressions, by keeping the elbows straight. Your shoulders need to be above your hands. The proper position of the hands is crucial as it will give the opportunity to control the pressure.
You should push fast and hard, at a rate of 100-120 compression per minute. During this procedure, you should compress 1/3 to 1/2 of your dog’s chest. An important thing to pay attention to, while making compressions, is to wait for the chest to completely get back to its initial position, prior to making the next compression. In other words, you need to wait for it to recoil.
Based on your paw friend’s size, you may need to make 15 compressions within 10 seconds (for big dog breeds) and 17 compressions (for small dog breeds).
Making compressions is not so easy, and you are likely to feel tired quite quickly. In this case, it would be helpful if you can ask someone for help. You can switch so that both of you can spare energy.
Step 4- Start Performing Artificial Respiration/Rescue Breaths
In order to do this, you should hold your dog’s mouth closed-put your hand above his/her mouth, and ensure that it is tightly closed. Make sure that your dog’s neck is extended so that the airway is open. After that, you need to put your mouth over your dog’s nostrils and exhale. Watch for the chest to rise. If your paw friend is of a small breed, exhaling lightly, might be enough. If he/she is a representative of a large breed, you may need to exhale more energetically.
Continue performing CPR by keeping the following general rule: administer 30 chest compressions and two breaths or 15 compressions and one breath, until your paw friend can breathe without additional help.
It is recommended that you check your dog's breathing and heartbeat every 2 minutes.
In case you have someone to help, you can divide the activities so that one person is engaged in making compressions, while the other person gives rescue breaths.
Step 5- Do an Abdominal Squeeze
Put your hand under your canine’s abdomen, then put the other hand over the first one. Start pushing to support the blood circulation. You should perform abdominal squeezes after a cycle of 30 compressions and two breaths.
Step 6- Regularly Check Your Dog’s Condition
You should watch for your dog to determine if he/she is responding. Check on him/her every 1-2 minutes and continue performing CPR until you get to the nearest veterinarian clinic.
CPR Courses
There are both in-person and online courses that will give you the knowledge needed to be able to correctly perform CPR as needed. The Red Cross offers such types of courses where you will be able to practice on an artificial dog. Veterinarian clinics and the local representative of Human Society may also be able to help. Of course, there are online courses, that you will be able to enroll in, regardless of your location.